|

 Android > resource - xml 리소스
xml 파일들도 리소스에 작성하여 사용할 수 있다.
사용할 xml 파일은 /res/ 밑에 xml 폴더를 생성하여 /res/xml 폴더에 넣어야 한다.
xml 폴더를 만드로 xml 파일을 하나 만들어서 호출해보자.
1. res(리소스)에 xml 파일 작성하기
/res/ 밑에 xml 폴더를 만들고 그 아래에 xml 파일을 작성한다.
여기서는 custom_list.xml 이라는 파일을 작성하겠다.
custom_list.xml 작성
- 를 선언하고 그 아래에 태그들을 작성하였다.
2. xml을 보여줄 작성
- 작성한 custom_list.xml 을 읽어와 파싱한 후, 화면에 형태로 보여줄 것이다.
- 화면에 보여줄를 하나 작성한다.
- id : ListView1 인 를 하나 작성했다.
- 현재 이에는 보여주는 데이터가 없다.
3. Activity.java 에서 xml 을 가져와 파싱하여 화면에 List 로 보여주기
- getResource().getXml() 을 사용하여 리소스에서 xml을 가져와서 XmlPullParser에 대입한다.
- 파싱된 xml을 종료 태그가 나올때 까지 while()에서 돌면서, 첫번째 속성값을 저장한다.
- 저장한 값들을에 등록하여 출력한다. 실행화면을 보자!
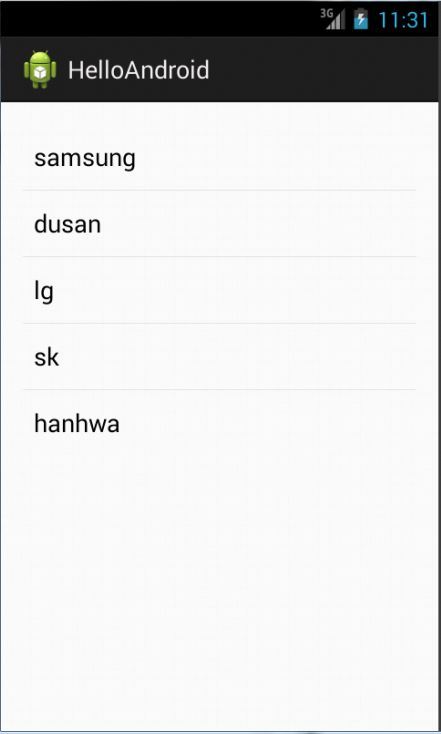
- 작성한 custom_list.xml 의 내용을 파싱하여 에 출력했다.
사용할 xml 파일은 /res/ 밑에 xml 폴더를 생성하여 /res/xml 폴더에 넣어야 한다.
xml 폴더를 만드로 xml 파일을 하나 만들어서 호출해보자.
1. res(리소스)에 xml 파일 작성하기
/res/ 밑에 xml 폴더를 만들고 그 아래에 xml 파일을 작성한다.
여기서는 custom_list.xml 이라는 파일을 작성하겠다.
custom_list.xml 작성
<relativelayout android:layout_height="match_parent" android:layout_width="match_parent" android:paddingbottom="@dimen/activity_vertical_margin" android:paddingleft="@dimen/activity_horizontal_margin" android:paddingright="@dimen/activity_horizontal_margin" android:paddingtop="@dimen/activity_vertical_margin" tools:context=".MainActivity" xmlns:android="http://schemas.android.com/apk/res/android" xmlns:tools="http://schemas.android.com/tools">

		<listview android:id="@+id/ListView1" android:layout_height="wrap_content" android:layout_width="fill_parent">

	</listview>
</relativelayout>
-
2. xml을 보여줄 작성
- 작성한 custom_list.xml 을 읽어와 파싱한 후, 화면에
- 화면에 보여줄
		<RelativeLayout xmlns:android="http://schemas.android.com/apk/res/android"
		xmlns:tools="http://schemas.android.com/tools"
		android:layout_width="match_parent"
		android:layout_height="match_parent"
		android:paddingBottom="@dimen/activity_vertical_margin"
		android:paddingLeft="@dimen/activity_horizontal_margin"
		android:paddingRight="@dimen/activity_horizontal_margin"
		android:paddingTop="@dimen/activity_vertical_margin"
		tools:context=".MainActivity" >

		<ListView
			android:id="@+id/ListView1"
			android:layout_width="fill_parent"
			android:layout_height="wrap_content"
			/>

	</RelativeLayout>
- id : ListView1 인 를 하나 작성했다.
- 현재 이
3. Activity.java 에서 xml 을 가져와 파싱하여 화면에 List 로 보여주기
	public class MainActivity extends Activity {

		@Override
		protected void onCreate(Bundle savedInstanceState) {
			super.onCreate(savedInstanceState);
			setContentView(R.layout.activity_main);

			// xml을 파싱하여 저장할 ArrayList를 선언한다.
			ArrayList items = new ArrayList();

			try{
				// custom_list.xml 을 가져와 XmlPullParser 에 넣는다.
				XmlPullParser customList = getResources().getXml(R.xml.custom_list);

				// 파싱한 xml 이 END_DOCUMENT(종료 태그)가 나올때 까지 반복한다.
				while(customList.getEventType()!=XmlPullParser.END_DOCUMENT) {
					// 태그의 첫번째 속성일 때,
					if(customList.getEventType()==XmlPullParser.START_TAG)	{
						// 이름이 "custom" 일때, 첫번째 속성값을 ArrayList에 저장
						if(customList.getName().equals("custom"))	{
							items.add(customList.getAttributeValue(0));
						}

					}

				  // 다음 태그로 이동
				  customList.next();
				}
			}catch(XmlPullParserException e){
			   e.printStackTrace();
			}catch(IOException e){
			   e.printStackTrace();
			}

			// ArrayAdapter에 ArrayList를 넣어서 ListView에 등록한다.
			ArrayAdapter adapter = new ArrayAdapter(this, android.R.layout.simple_list_item_1, items);

			ListView listView1 = (ListView)findViewById(R.id.ListView1);
			listView1.setAdapter(adapter);
		}
	}
- getResource().getXml() 을 사용하여 리소스에서 xml을 가져와서 XmlPullParser에 대입한다.
- 파싱된 xml을 종료 태그가 나올때 까지 while()에서 돌면서, 첫번째 속성값을 저장한다.
- 저장한 값들을
- 작성한 custom_list.xml 의 내용을 파싱하여
|
|
||||
|
이메일 문의 : cak0280@nate.com Copyright 2000 By ENTERSOFT.KR All Rights Reserved. |