|

 Android > ActionBar - Tab + Fragment 구현 방법
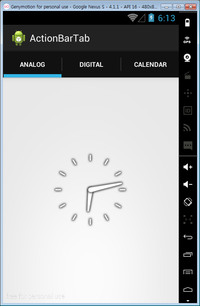
ActionBar에 Tab을 구현할때는 가급적 Fragment를 사용하시는 것이 코드관리 및 리소스관리에 용이합니다.
기존의 GB 이하의 버전에서는 TabActivity를 통해 ViewGroup으로 Tab을 생성 및 관리를 했었다.
하지만 ICS부터는 위의 방법보다 ActionBar와 Fragment를 이용해 Tab을 구성하기를 권한다. (API 13 부터 적용)
Fragment 사용방법을 알아보도록 하겠습니다.
Tab 메뉴 제작 순서 입니다.
		1. 현재 Activity의 ActionBar 레퍼런스를 받아온다.
		2. ActionBar를 Navigation Mode로 설정한다.
		3. ActionBar에 Tab에 관련된 리스너를 등록하고, 각 Tab에 들어갈 Fragment를 설정한다.
먼저 Tab을 클릭할때 나오는 layout 을 디자인 합니다.
layout 폴더에 layout_frag01.xml 파일을 만듭니다.
	<?xml version="1.0" encoding="utf-8"?>
	<LinearLayout xmlns:android="http://schemas.android.com/apk/res/android"
		android:layout_width="match_parent"
		android:layout_height="match_parent"
		android:orientation="vertical" >

		<TextView
			android:id="@+id/user_name"
			android:layout_width="100dp"
			android:layout_height="wrap_content"
			android:text="frag01" />

	</LinearLayout>
layout 폴더에 layout_frag02.xml 파일을 만듭니다.
	<?xml version="1.0" encoding="utf-8"?>
	<LinearLayout xmlns:android="http://schemas.android.com/apk/res/android"
		android:layout_width="match_parent"
		android:layout_height="match_parent"
		android:orientation="vertical" >

		<TextView
			android:id="@+id/user_name"
			android:layout_width="100dp"
			android:layout_height="wrap_content"
			android:text="frag02" />

		<Button
			android:id="@+id/button1"
			android:layout_width="wrap_content"
			android:layout_height="wrap_content"
			android:text="Button" />

	</LinearLayout>
layout 폴더에 layout_frag03.xml 파일을 만듭니다.
	<?xml version="1.0" encoding="utf-8"?>
	<LinearLayout xmlns:android="http://schemas.android.com/apk/res/android"
		android:layout_width="match_parent"
		android:layout_height="match_parent"
		android:orientation="vertical" >

		<TextView
			android:id="@+id/user_name"
			android:layout_width="100dp"
			android:layout_height="wrap_content"
			android:text="frag03" />

	</LinearLayout>
MainActivity.java 파일 내용 입니다.
	public class MainActivity extends Activity {

		ActionBar actionBar;  //ActionBar 참조변수

		@Override
		protected void onCreate(Bundle savedInstanceState) {
			super.onCreate(savedInstanceState);

			//setContentView(R.layout.layout_main);


			ActionBar abar = getActionBar();
			abar.setNavigationMode( ActionBar.NAVIGATION_MODE_TABS );

			 // tab
			Tab tab1 = abar.newTab();
			tab1.setText("tab_1");
			tab1.setIcon(R.drawable.btn_tab1);		//Tab 메뉴에 아이콘을 삽입할 수 있다.
			TabTestListener<Fragment01> a = new TabTestListener<Fragment01>(this, "1", Fragment01.class);
			tab1.setTabListener(a);

			Tab tab2 = abar.newTab();
			tab2.setText("tab_2");
			tab2.setIcon(R.drawable.btn_tab2);		//Tab 메뉴에 아이콘을 삽입할 수 있다.
			TabTestListener<Fragment02> b = new TabTestListener<Fragment02>(this, "1", Fragment02.class);
			tab2.setTabListener(b);

			Tab tab3 = abar.newTab();
			tab3.setText("tab_3");
			tab3.setIcon(R.drawable.btn_tab1);		//Tab 메뉴에 아이콘을 삽입할 수 있다.
			TabTestListener<Fragment03> c = new TabTestListener<Fragment03>(this, "1", Fragment03.class);
			tab3.setTabListener(c);

			abar.addTab(tab1);
			abar.addTab(tab2);
			abar.addTab(tab3);
		}

		@Override
		public boolean onCreateOptionsMenu(Menu menu) {
			// Inflate the menu; this adds items to the action bar if it is present.
			getMenuInflater().inflate(R.menu.menu, menu);
			return true;
		}

		@Override
		public boolean onOptionsItemSelected(MenuItem item) {
			// Handle action bar item clicks here. The action bar will
			// automatically handle clicks on the Home/Up button, so long
			// as you specify a parent activity in AndroidManifest.xml.
			int id = item.getItemId();
			if (id == R.id.item1) {
				return true;
			}
			return super.onOptionsItemSelected(item);
		}


		class TabTestListener<T extends Fragment> implements TabListener {
			private Fragment mFragment;
			private final Activity mActivity;
			private final String mTag;
			private final Class<T> mClass;

			public TabTestListener(Activity activity, String tag, Class<T> clz)	 {
				mActivity = activity;
				mTag = tag;
				mClass = clz;
			}

			public void onTabSelected(Tab tab, FragmentTransaction ft)	 {
				if (mFragment == null)
				{
					mFragment = Fragment.instantiate(mActivity, mClass.getName());
					ft.add(android.R.id.content, mFragment, mTag);
				} else {
					ft.attach(mFragment);
				}
			}

			public void onTabUnselected(Tab tab, FragmentTransaction ft)	 {
				if (mFragment != null)
				{
					ft.detach(mFragment);
				}
			}

			public void onTabReselected(Tab tab, FragmentTransaction ft)	 {
			}
		}

	}
Fragment01.java , Fragment02.java , Fragment03.java 화일 내용 입니다.
	public class Fragment01 extends Fragment {

		/** Called when the activity is first created. */
		@Override
		public View onCreateView(LayoutInflater inflater, ViewGroup container, Bundle savedInstanceState)
		 {
		  View view = inflater.inflate(R.layout.layout_frag01, null);
		  return view;
		 }


	}
	public class Fragment02 extends Fragment {

		Context mContext;

		/** Called when the activity is first created. */
		@Override
		public View onCreateView(LayoutInflater inflater, ViewGroup container, Bundle savedInstanceState)
		 {
		  View view = inflater.inflate(R.layout.layout_frag02, null);

		  Button btn11 = (Button) view.findViewById(R.id.button1);

		  mContext = container.getContext();

		  btn11.setOnClickListener(new OnClickListener() {
				@Override
				public void onClick(View arg0) {
					Toast toast = Toast.makeText(mContext, "button1 클릭!!!!",Toast.LENGTH_LONG);
					toast.show();
				}
			});

		  return view;
		 }
	}
	public class Fragment03 extends Fragment {

		/** Called when the activity is first created. */
		@Override
		public View onCreateView(LayoutInflater inflater, ViewGroup container, Bundle savedInstanceState)
		 {
		  View view = inflater.inflate(R.layout.layout_frag03, null);
		  return view;
		 }
	}
|
|
||||
|
이메일 문의 : cak0280@nate.com Copyright 2000 By ENTERSOFT.KR All Rights Reserved. |